Case study of visualization of adhesive and moisture content
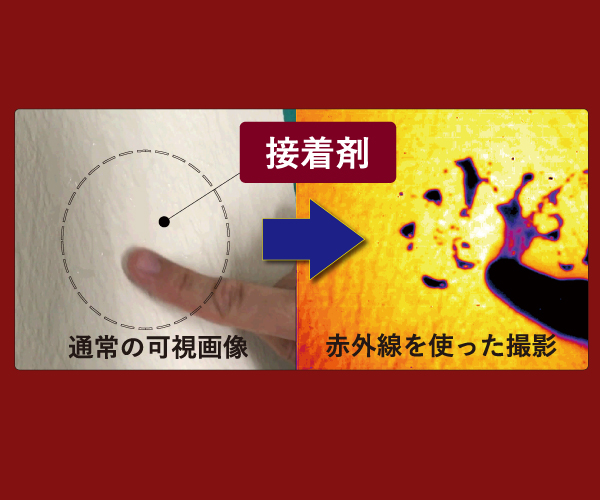
Visualization of Unevenness of Coating and Unevenness of Moisture by Infrared Camera
Thickness irregularities and drying conditions of transparent materials such as coatings and adhesives are among the items that are difficult to inspect with conventional point measurement or for which no inspection method at all exists. Therefore, in many cases, processes are controlled through subjective parameters and are subject to instabilities. However, unevenness or non-uniformity in a coating process is causing problems rapidly leading to complaints about the products manufactured. Against this background, we have established a new measurement technology that can visualize uneven coating.
We can propose the optimal visualization device for each material by investigating the wavelength characteristics of each material and constructing an optical system suitable for each material.
Past cases of measurement results
- Moisture content inside and on the surface of packaging films: quantitative evaluation on the μm order is possible.
- Unevenness of high-performance glass coating: visualization of unevenness at speeds of 350Hz or higher
- 2-D measurement of adhesive thickness: thickness discrimination between 0, 3.0, and 9.0μm samples, etc.
Process of installation of the equipment
- Confirmation of measurement target
- Measurement and investigation of optical characteristics
- Construction and verification of optical system
- Installation of the equipment

